If you have ever looked at a modern website’s source code and wondered how assistive tools actually interpret the design, you are not alone. Most web developers and business owners look at terms like WCAG, ADA compliance, and ARIA attributes and immediately feel overwhelmed by a sea of technical jargon.
The confusion around web accessibility does not exist because making a website accessible is inherently difficult. It exists because the guidelines are usually written like legal textbooks or dry academic documentation rather than practical engineering steps. Many teams treat accessibility as an afterthought, stacking uncoordinated code snippets together and hoping for the best.
In real workflows, true digital accessibility is not about checking boxes or hiding bad structure behind hidden code layers. It is about understanding exactly how your content communicates with assistive technologies to create a seamless experience for every single visitor.
🏗️ How the Browser Accessibility Tree Processes Web Content
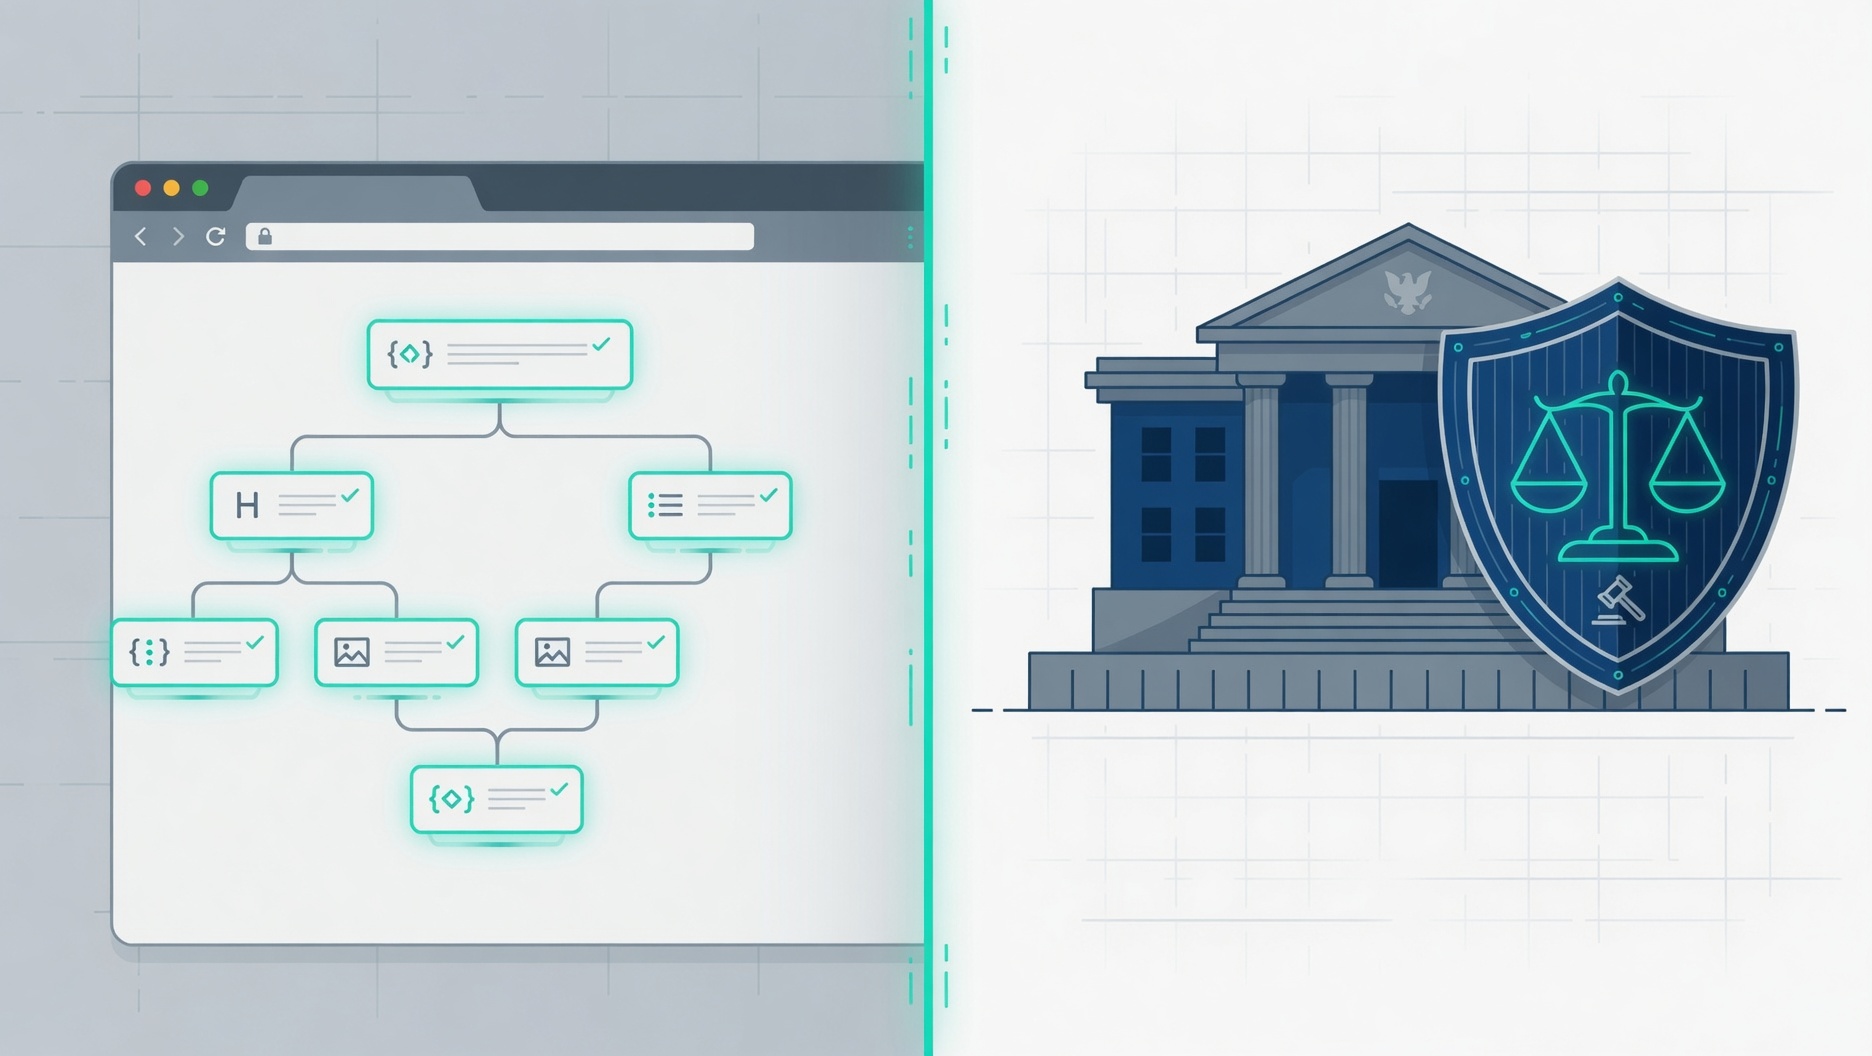
To understand web accessibility, you must look past raw HTML code and focus on how a web browser builds the Accessibility Tree to expose information to assistive tools like screen readers and refreshable braille displays.
[ Raw HTML Markup ]
        │
        ▼
[ Document Object Model (DOM) ]
        │
        ▼
[ Accessibility Tree ] ◄─── (Where ARIA modifies name, role, & state)
        │
        ▼
[ Assistive Technology ] (Screen Readers, Braille Displays)
The Accessibility Tree is a specialized, programmatically generated subset of the standard Document Object Model (DOM). While the DOM contains every single element, style, and script required to visually render a page, the browser actively strips away visual styling to pass only semantic data to the Accessibility Tree. Assistive technologies rely entirely on this tree to determine four critical data points for every onscreen element:
Name: The specific textual identity or label of the component (e.g., “Submit Order”).
Role: The structural classification defining what the element is (e.g., button, link, checkbox).
State: The current functional condition of the widget (e.g., expanded, checked, disabled).
Value: The specific data payload held by the element, common in form inputs or progress bars.
When a screen reader speaks to a user, it is not parsing your raw CSS or un-semantic Javascript strings. It is reading the flattened structural snapshot provided by the Accessibility Tree. If an element does not exist correctly within this tree, it functionally does not exist for an assistive technology user.
🌉 What is ARIA and How Does It Bridge the Semantic Gap?
Accessible Rich Internet Applications (ARIA) is a specialized technical specification created by the World Wide Web Consortium (W3C) to inject missing semantic metadata directly into the browser’s Accessibility Tree.
<!-- Visual HTML (Meaningless to the Accessibility Tree) -->
<div class="custom-toggle" onclick="toggleOption()"></div>

<!-- Augmented with ARIA (Perfectly understood by Assistive Tech) -->
<div role="switch" aria-checked="true" aria-label="Enable notifications" tabindex="0"></div>
In an ideal development ecosystem, native HTML elements handle all semantic definitions automatically. However, modern web applications frequently rely on complex JavaScript frameworks to transform generic elements like <div> and <span> into interactive user interface components like custom modal windows, slider bars, and accordion menus. Because a standard layout <div> has zero inherent meaning within the Accessibility Tree, screen readers cannot communicate its purpose to a user.
ARIA solves this breakdown by acting as a translation bridge. It allows developers to explicitly define the exact Role, State, and Property of any custom-built element. By using these attributes correctly, you can rewrite how an element registers inside the Accessibility Tree without altering its visual layout or CSS styling on the screen.
🏛️ Who Came Up With ARIA and Where Are the Standards Kept?
The ARIA standard was conceived in the mid-2000s through a joint collaboration of major tech hardware manufacturers, browser developers, and accessibility advocacy groups working under the Web Accessibility Initiative (WAI) branch of the W3C.
The master, authoritative registry for these technical standards is permanently hosted and updated in the public W3C WAI-ARIA Specification Repository. This living document serves as the global blueprint that browser engines (like Chromium, WebKit, and Gecko) and screen reader software software developers follow to ensure cross-platform compatibility.
In practice, keeping track of changing browser APIs and compliance standards takes time away from growing your actual business. That is why our team at VerseOne.ai handles the heavy lifting through specialized Web Accessibility Remediation Services to bring digital storefronts and workflows into complete alignment with global standards.
🗂️ The Four Technical Categories of ARIA Attributes
To build a reliable interface, you must understand that the ARIA specification is not a random collection of tags. It is divided into four distinct technical categories designed to modify the Accessibility Tree based on specific interactive conditions.
Many development teams fail audit checks because they mix these categories incorrectly. In real workflows, each group serves an exact structural purpose.
Widget attributes define the real-time, changing condition of custom interface components. Whenever your JavaScript alters the visual appearance of a widget (such as revealing a hidden menu or checking a box), a matching widget attribute must update programmatically inside the Accessibility Tree.
aria-expanded: Tells assistive tools whether a collapsible panel, dropdown menu, or accordion layout is currently open (true) or closed (false).
aria-checked: Reflects the selection state of a custom checkbox or radio button (true, false, or mixed).
aria-disabled: Signals that an interactive element exists visually but is currently non-functional.
aria-invalid: Flags that the data entered into a form field fails your system’s validation rules.
📢 2. Live Region Attributes (Handling Real-Time Content Updates)
By default, screen readers only announce content when a user actively navigates to an element. If a web page dynamically updates content on a different part of the screen via background scripts, visually impaired users will miss it entirely. Live regions force the browser to announce updates immediately without moving the user’s keyboard focus.
aria-live: Sets the urgency level for announcements. Using aria-live="polite" waits until the user finishes typing or reading, while aria-live="assertive" interrupts the user for critical errors.
aria-atomic: Determines if the screen reader should speak the entire updated container (true) or only the specific text string that changed (false).
aria-busy: Notifies assistive software that a section is currently reloading or fetching data, preventing the reader from announcing an incomplete layout.
Relationship attributes build invisible semantic bridges between completely separate HTML elements on a page. These are crucial when an action performed on one element directly manipulates, controls, or describes an element located elsewhere in the DOM.
aria-controls: Establishes a direct programmatic link between a controlling element (like a tab button) and the container it populates (like a tab panel).
aria-owns: Rearranges the visual hierarchy for assistive devices by forcing a parent-child relationship between two elements that cannot be nested together within the raw HTML markup.
aria-posinset and aria-setsize: Defines an element’s exact numerical position and total count within a custom list or data feed when standard <ol> or <li> tags cannot be used.
🌍 4. Global ARIA Attributes (Universal Markup Support)
Global attributes are a unique subset of properties that can be safely applied to any native HTML element on your website, regardless of whether a specific ARIA role is present.
aria-hidden: Completely removes an element and all its children from the Accessibility Tree. This is ideal for hiding decorative graphics, background illustrations, or redundant text that would confuse screen reader navigation.
aria-current: Indicates the active item within a set of identical links, such as marking the specific page a user is currently browsing within a main navigation menu.
🏷️ ARIA Labeling vs. ARIA Descriptions: Knowing When to Use Which Tool
The absolute foundation of web accessibility is ensuring every interactive element has a clear identity. The ARIA specification provides three distinct attributes to handle this, but they are designed for very different scenarios.
Use aria-label when an element has no visible text label on the screen, and you need to pass a direct text string straight to the Accessibility Tree.
The most common real-world application is an icon-only button. For example, a button containing only a graphical “X” icon is visually obvious to sighted users, but a screen reader will ignore it or read generic code. Applying aria-label="Close modal" ensures the true function is spoken clearly.
🔹 When to Use aria-labelledby
Use aria-labelledby when the text that should label your interactive element is already visible somewhere else on the page.
Instead of typing out a manual string, you pass the exact HTML id of the existing visible text element. This ensures that if your marketing or copywriting team updates the visible text on the page in the future, the screen reader label automatically updates with it, preventing structural desynchronization.
🔹 When to Use aria-describedby
Use aria-describedby when an element already has a primary name, but requires secondary, supportive context, instructions, or validation rules.
Unlike the previous two attributes which define what the element is, aria-describedby maps to a distinct paragraph or block of text explaining how to use it. A classic example is a form input field where the primary label is “Password”, but a small paragraph underneath states “Must contain at least 8 characters.” Linking that paragraph via aria-describedby ensures the user hears the rules right after the field name is announced.
Most automated scanning systems can find missing labels, but they cannot tell you if your live regions or interactive states are coded properly. If you are dealing with broken user flows or complex interface problems, our engineering team at VerseOne.ai provides specialized AI Automation & Custom Technical Help to streamline your systems and eliminate structural errors.
⚖️ Is ARIA Mandated for WCAG 2.2 Level AA Compliance?
A common misconception among web developers is that individual ARIA attributes are explicitly written into accessibility law. In reality, no single ARIA attribute is universally mandated by the W3C Web Content Accessibility Guidelines (WCAG 2.2 Level AA).
Because the WCAG framework is designed to be completely technology-agnostic, it outlines what functional accessibility milestones your website must achieve, not the exact language syntax you must use to get there. You can build a 100% compliant web asset without ever touching ARIA, provided you use perfect, semantic, native HTML markup.
However, ARIA becomes functionally mandatory the exact microsecond your interface deviates from native HTML tags. If your project utilizes custom layout blocks to handle interactive behaviors, specific ARIA attributes are required to satisfy key WCAG Success Criteria:
Success Criterion 1.3.1 – Info and Relationships (Level A): Structural groupings and relationships shown visually must be programmatically identifiable. If you build custom tabs or accordion menus using generic markup, you must use attributes like role="tab" and aria-expanded to maintain this programmatic relationship in the Accessibility Tree.
Success Criterion 4.1.2 – Name, Role, Value (Level A): Every user interface control must expose its exact identity, current operational state, and calculated name. When native buttons or inputs are swapped for custom script-driven components, attributes like aria-label or aria-selected become your only pathway to legal compliance.
Success Criterion 4.1.3 – Status Messages (Level AA): When dynamic content, form success messages, or real-time alert texts populate onscreen, the interface must notify assistive technology users without forcing their focus away from their current task. This requires the explicit use of role="status", role="alert", or custom aria-live regions.
🏗️ The Ideal Native Alternative Labels (And How They Combine With ARIA)
In web accessibility engineering, the universal directive is simple: The absolute best ARIA is no ARIA at all. Native HTML tags have deep, built-in browser mappings that automatically feed structural context straight into the Accessibility Tree without the risk of script failures or syntax typos.
🌟 The Baseline Native Elements to Prioritize
Before you reach for any ARIA properties, ensure your codebase maximizes these native structures:
Standard Nested Text: Plain text placed natively between elements like <button>Submit</button> or <a href="...">Home</a> automatically sets the accessible name.
The Form <label> Element: Explicitly mapping a form text element using the for attribute to match an input’s id (e.g., <label for="email">).
The Visual Image alt Attribute: Used exclusively inside the <img> tag to give immediate semantic text translations to visual imagery.
The Fieldset <legend> Tag: Provides an overarching structural description to an entire nested group of related inputs, like radio button lists.
🤝 The Strict Rules of Inheritance: Combining Native Labels with ARIA
You can safely mix native tags and ARIA elements on the same page, but you must understand how the browser calculates the final outcome using the Accessible Name and Description Computation.
⚠️ The Total Override Rule
When you place an ARIA labeling attribute directly onto an element that already contains native visible text, the ARIA attribute acts as a clean slate. It completely erases and replaces the native text within the browser’s Accessibility Tree.
<!-- Sighted users will see the word "Go". -->
<!-- Screen reader users will ONLY hear "Search the official catalog". -->
<button aria-label="Search the official catalog">Go</button>
🛡️ The Safe Combination Rule
If your goal is to augment an existing native element rather than destroy its identity, use aria-describedby instead of an explicit label. This attaches extra technical details or secondary verification instructions without overriding the main semantic name of the element.
<!-- Screen reader calculation order: "Username, input field. Enter your registered business email address." -->
<label for="usr">Username</label>
<input type="text" id="usr" aria-describedby="field-tip">
<p id="field-tip">Enter your registered business email address.</p>
Navigating the nuance of WCAG 2.2 rules while maintaining your visual brand identity can feel incredibly tight. At VerseOne.ai, our Web Accessibility Remediation (ADA/WCAG Compliance) specialists manually restructure underlying enterprise architectures, ensuring your site achieves complete semantic alignment without breaking your front-end design workflows.
🛠️ The Custom UI Blueprint: Putting ARIA and Native Elements Into Production
When you move past basic structural elements and begin coding custom interactive components—such as modal dialog boxes, navigation menus, or custom form tools—you must manually stitch together multiple ARIA attributes to prevent total accessibility failures.
To help you safely execute these in your production workflows, look at how the code translates directly into the browser’s Accessibility Tree for a standard interactive component.
🗂️ Production Layout Example: A Custom Accordion Component
<!-- The Accordion Header (Controls Visibility and States) -->
<button
  id="accordion-trigger-1"
  class="accordion-header"
  aria-expanded="false"
  aria-controls="accordion-panel-1">
  💼 What services does VerseOne.ai offer?
</button>

<!-- The Accordion Content Panel (Holds the Structural Data) -->
<div
  id="accordion-panel-1"
  class="accordion-panel"
  role="region"
  aria-labelledby="accordion-trigger-1"
  hidden>
  <p>We provide full-scale Web Accessibility Remediation, AI workflow integration, and digital storefront setup solutions.</p>
</div>
🔍 Behind the Scenes of This Pattern:
The Button Trigger: Because we use a native <button>, the browser automatically makes it keyboard navigable and assigns a button role in the Accessibility Tree.
aria-expanded="false": This tells a visually impaired user that the content panel is currently collapsed. When your JavaScript detects a user click, it toggles this value to true at the exact same moment it updates the visual CSS layout.
aria-controls="accordion-panel-1": Builds an explicit programmatic link between the button trigger and the separate layout panel below it.
role="region": Upgrades the standard layout <div> into a high-level layout landmark inside the Accessibility Tree, making it easily scannable by screen readers.
aria-labelledby="accordion-trigger-1": Instead of duplicating text strings, the panel automatically pulls its structural name directly from the text nested inside the button trigger.
📋 The Essential Web Accessibility Architecture Checklist
Before launching any new interactive layout, run through this baseline engineering checklist to confirm your ARIA and native elements function harmoniously:
[ ] Keyboard Baseline: Can every single interactive custom element on the screen be reached using only the Tab key, and activated using the Enter or Spacebar key?
[ ] No Shadow Elements: If you have used aria-hidden="true", have you confirmed that it does not accidentally contain any active, keyboard-focusable elements?
[ ] Role Complement Check: If you added a custom ARIA interactive role (like role="switch" or role="checkbox"), have you actively modified your JavaScript listeners to handle the matching state updates (aria-checked)?
[ ] Strict Syntax Validation: Have you verified your attributes against the official specification to ensure you are not assigning widget properties to invalid layout tags (such as trying to pass aria-checked onto a role="heading")?
[ ] Name Computation Priority: Are you certain that your inline aria-label strings are not unintentionally overwriting critical visible text nodes on the page?
📈 Systems Over Tool-Stacking: The Real Path to Compliance
At the end of the day, individual code snippets and quick-fix automated overlay plug-ins do not fix accessibility issues. In real digital systems, deep compliance cannot be achieved by spraying random ARIA tags over a broken visual framework.
True digital equality happens when your fundamental underlying architecture is built with clarity, logic, and consistent programmatic systems from the ground up.
💡 Decoding Digital Accessibility: Section 508 vs ADA Title Compliance
If you have ever looked into digital compliance and felt overwhelmed by a mountain of technical acronyms like WCAG, ADA, and Section 508, you are definitely not alone.
Most business owners and digital builders are not struggling because accessibility is inherently too difficult to grasp. They are struggling because the guidelines are written like legal textbooks and the technical definitions are completely fragmented across different agencies.
In practice, digital accessibility is simply about building connected systems that allow every single user to interact with your website cleanly. What actually matters is understanding how the global guidelines translate into real-world US legal requirements so you can protect your brand and build a better user experience.
At VerseOne.ai, we focus on breaking down these complex systems into practical, actionable steps for your business. Let us demystify exactly how the technical rules connect to the actual laws. Generate a free accessibility report of your website.
🌐 The Tech Rulebook: Navigating the WCAG 2.1 vs. WCAG 2.2 Standards
When it comes to the technical rulebook, the Department of Justice explicitly mandates the WCAG 2.1 Level AA standard as the baseline legal benchmark for digital compliance.
These individual criteria are the literal, testable design rules created by the World Wide Web Consortium (W3C) Web Accessibility Initiative (WAI). They do not just apply to standard text pages; they govern complex interactive web components like pop-up modals, signup forms, and navigation menus.
The entire framework scales across three distinct tiers of compliance:
Level A: The absolute minimum foundation. If a web element fails here, assistive tools are completely blocked.
Level AA: The global legal standard. This tier eliminates the most common, significant real-world barriers for users.
Level AAA: The highest, most specialized standard. It is rarely mandated as a blanket requirement across an entire commercial site.
Decoding the WCAG 2.2 Math: What Actually Changed?
If you try to count the rules in the latest Web Content Accessibility Guidelines (WCAG), the numbers can get confusing quickly.
The Compliance Breakdown
To achieve Level AA compliance, you must always pass all Level A and Level AA rules combined.
The table below breaks down exactly how the criteria are distributed across versions:
WCAG Version
Level A (Minimum)
Level AA (Standard)
Level AAA (Highest)
Total (All Levels)
WCAG 2.1
25 criteria
25 criteria
28 criteria
78 total criteria
WCAG 2.2
31 criteria
24 criteria
31 criteria
86 total criteria
The Real Impact on Your Website
If your website is already compliant with WCAG 2.1 Level AA, you do not have to worry about all 86 rules. You only need to focus on what shifted between the versions.
Here is the exact math for standard website compliance:
The Additions: WCAG 2.2 introduces 6 new rules at the A and AA levels combined.
The Subtraction: WCAG 2.2 completely removes 1 old rule (Criterion 4.1.1: Parsing), because modern web browsers now handle code errors automatically.
The Final Count: Your target checklist moves from 50 rules under WCAG 2.1 up to 55 rules under WCAG 2.2.
These new requirements focus heavily on improving mobile layouts, making login forms easier for users with cognitive disabilities, and ensuring buttons are easy to click.
[WCAG Legal Framework Alignment]
 ├── WCAG 2.1 Level AA (Current Minimum Legal Target -> 50 Criteria)
 └── WCAG 2.2 Level AA (The Future-Proof Standard -> 55 Criteria)
In real workflows, modern websites manage these rules by grouping them under four core principles known as POUR: Perceivable, Operable, Understandable, and Robust. This ensures your content survives shifting browser updates and remains fully accessible to human senses and machine code alike.
⚖️ US Enforcement Realities: Section 508 vs. ADA Title Rules
Section 508 and the Americans with Disabilities Act (ADA) are two entirely separate statutes that use the exact same technical benchmark to enforce digital compliance.
The critical distinction comes down to who the law regulates:
Section 508: Applies strictly to Federal agencies, federally funded programs, and direct federal tech contractors.
ADA Title II: Applies to state and local public entities, including public universities, local towns, and municipal transit authorities.
ADA Title III: Applies to places of public accommodation, which courts overwhelmingly interpret as commercial websites, e-commerce stores, and customer portals.
The federal government officially adopted WCAG as the formal measurement for these laws, with the Department of Justice explicitly mandating WCAG Level AA compliance.
               ┌── Section 508 ──► Federal Government & Contractors
               │
WCAG Level AA ─┼── ADA Title II ─► State & Local Public Entities
               │
               └── ADA Title III ──► Private Businesses & E-commerce
Many businesses find that ignoring these frameworks results in severe financial and administrative liability. For private companies under ADA Title III, enforcement is driven by civil litigation, where businesses are regularly forced to pay plaintiff attorney fees, administrative fines exceeding $100,000, and mandatory remediation costs.
For federal vendors under Section 508, non-compliance means the immediate loss of lucrative government contracts and disqualification from future bidding rounds.
🛠️ Connected Digital Systems: Designing Beyond the Rulebook
To keep your digital infrastructure safe for the long haul, it is incredibly helpful to study parallel topics that connect directly to core compliance standards.
Many teams find success by mapping out a future learning roadmap centered around these three pillars:
WAI-ARIA Specifications: The technical framework of HTML attributes that allows you to manually inject roles and states straight into the accessibility tree.
Native Screen Reader Testing: Learning the basic keyboard navigation commands for industry-standard screen readers like NVDA for Windows or VoiceOver for Apple devices.
Automated vs. Manual Auditing: Balancing automated scanners with manual keyboard-only testing to catch structural logic flaws that automated tools naturally miss.
This is exactly why VerseOne.ai focuses on building interconnected digital environments instead of just stacking disconnected software solutions. Whether you need comprehensive web accessibility remediation, smart AI automation workflows, or optimized digital storefront setups, we ensure your systems are robust, legal, and built to scale.
📋 What Is Your Digital Accessibility Strategy?
Most small business owners and operators assume their digital storefront is perfectly accessible to everyone who visits it. In practice, however, small issues hidden behind the scenes regularly affect your usability, search visibility, and legal compliance (especially if your website was built quickly, updated over time, or assembled from different, fragmented plugins).
None of this is unusual, and it does not mean your team has neglected your digital space. It simply means no one has taken a close look at the system’s underlying accessibility architecture yet.
Instead of guessing where your business stands or waiting for a high-stakes legal notice, you can proactively secure your platform. We run a structured, plain-English accessibility review that scans your digital storefront for the most common structural vulnerabilities, including:
Reading Barriers: Spotting low-contrast layout text that is difficult for your customers to read.
Broken Data Structures: Identifying missing heading outlines that assistive tools rely on to map your pages.
Invisible Click Targets: Flagging buttons, form fields, or links that lack explicit labels.
Keyboard Traps: Isolating entire pages or menus that fail to function properly without a standard mouse.
Digital Risk Management
 ├── ⚠️ Guessing Your Status ──► ⚠️ High Legal Exposure & Abandoned Carts
 └── ✅ Getting Your Report  ──► ✅ Priority Action Plan & Brand Protection
We will add your website to our individual review queue and email you a clean, PDF breakdown showing exactly what is working, what needs attention, and which high-impact areas you should focus on fixing first to minimize your risk.
Ever had 15 LibreOffice windows open and your system starts acting like a tired toddler? 💤
You want to restart, but the thought of digging through five different folders to find those exact “.ods” files is a nightmare.
LibreOffice is amazing (seriously), but it has one giant flaw: it doesn’t have a “Store Session” button.
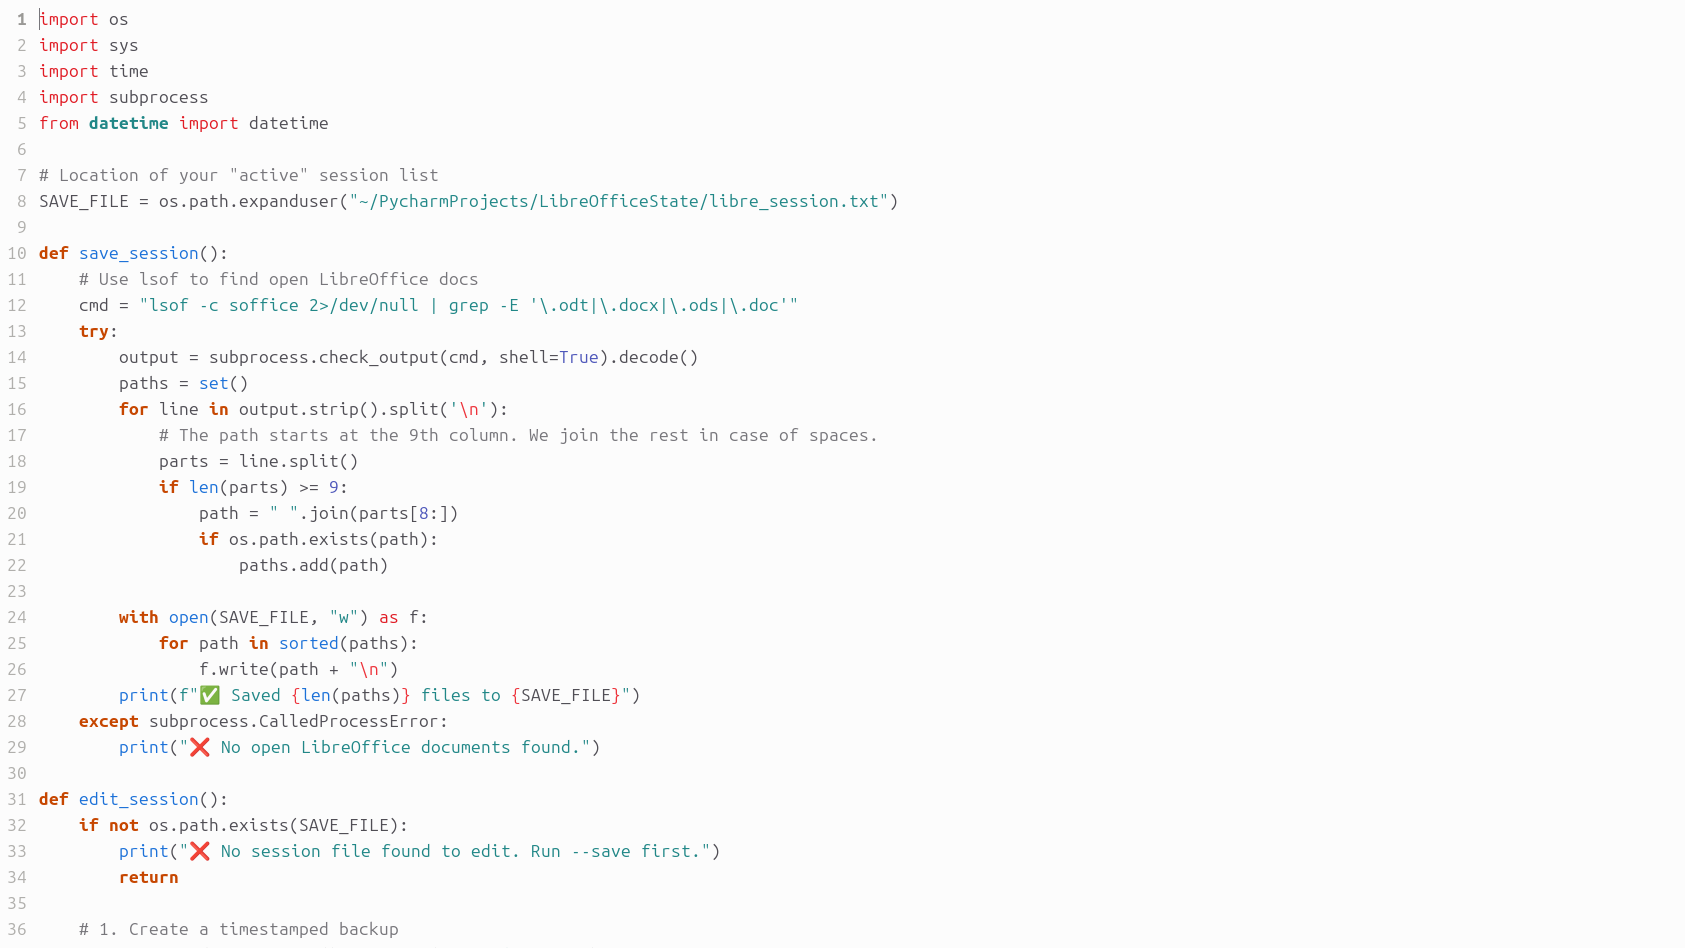
I got tired of the manual hunt. So, I wrote a tiny Python tool to do the heavy lifting for me. 🛠️
It scans your open files, saves the list, let’s you edit what you actually want to keep, and reopens them one-by-one so your RAM doesn’t whine. 💥
The “Session Saver” Script
Paste this into a file named libre.py.
python
import os
import sys
import time
import subprocess
from datetime import datetime

# Location of your "active" session list
SAVE_FILE = os.path.expanduser("~/libre_session.txt")

def save_session():
    # Use lsof to find open LibreOffice docs
    cmd = "lsof -c soffice 2>/dev/null | grep -E '\.odt|\.docx|\.ods|\.doc'"
    try:
        output = subprocess.check_output(cmd, shell=True).decode()
        paths = set()
        for line in output.strip().split('\n'):
            parts = line.split()
            if len(parts) >= 9:
                path = " ".join(parts[8:])
                if os.path.exists(path):
                    paths.add(path)

        with open(SAVE_FILE, "w") as f:
            for path in sorted(paths):
                f.write(path + "\n")
        print(f"✅ Saved {len(paths)} files to {SAVE_FILE}")
    except subprocess.CalledProcessError:
        print("❌ No open LibreOffice documents found.")

def edit_session():
    if not os.path.exists(SAVE_FILE):
        print("❌ No session file found. Run --save first.")
        return

    # 1. Create a timestamped backup
    timestamp = datetime.now().strftime("%Y%m%d_%H%M%S")
    backup_file = os.path.expanduser(f"~/libre_session_{timestamp}.txt")
    subprocess.run(["cp", SAVE_FILE, backup_file])
    print(f"📦 Backup created: {os.path.basename(backup_file)}")

    # 2. Open in Ubuntu's default editor
    print(f"📝 Opening session list for editing...")
    subprocess.run(["xdg-open", SAVE_FILE])

def restore_session():
    if not os.path.exists(SAVE_FILE):
        print("❌ No save file found.")
        return

    with open(SAVE_FILE, "r") as f:
        paths = [line.strip() for line in f if line.strip()]

    if not paths:
        print("📭 Session file is empty.")
        return

    print(f"🚀 Restoring {len(paths)} files with a 3s delay...")
    for path in paths:
        if os.path.exists(path):
            print(f"Opening: {os.path.basename(path)}")
            subprocess.Popen(["libreoffice", path])
            time.sleep(3)
        else:
            print(f"⚠️ Skipping: {path}")

if __name__ == "__main__":
    if "--save" in sys.argv:
        save_session()
    elif "--edit" in sys.argv:
        edit_session()
    elif "--restore" in sys.argv:
        restore_session()
    else:
        print("Usage: python3 libre.py --save | --edit | --restore")
How to use it like a pro
First, make it a quick command. Open your .bashrc and add an alias.
alias libre='python3 /path/to/your/libre.py'
Now, when you are ready to shut down, just type libre --save in your terminal.
If you realized you don’t actually need that “Budget 2019” sheet open, run libre --edit. It quickly backs up a copy, and then pops open your text editor so you can trim the list. ✍️
After you reboot, run libre --restore.
The script waits 3 seconds between each file. This gives your CPU a chance to breathe so your desktop doesn’t lock up. 🌬️
No more manual searching. No more lost context. Just clean, automated productivity. 🚀
If you’ve ever worked with microcontrollers, you know the feeling. You flash a chip, it doesn’t work, and you’re left staring at a silent piece of silicon :'(
To fix it, you need an In-Circuit Emulator (ICE) or a Logic Analyzer. You need to see the registers, the stack, and the timing in real-time.
Building an AI Agent to design electronics is exactly the same. Without a “Debug Header,” the AI is just a black box spitting out text.
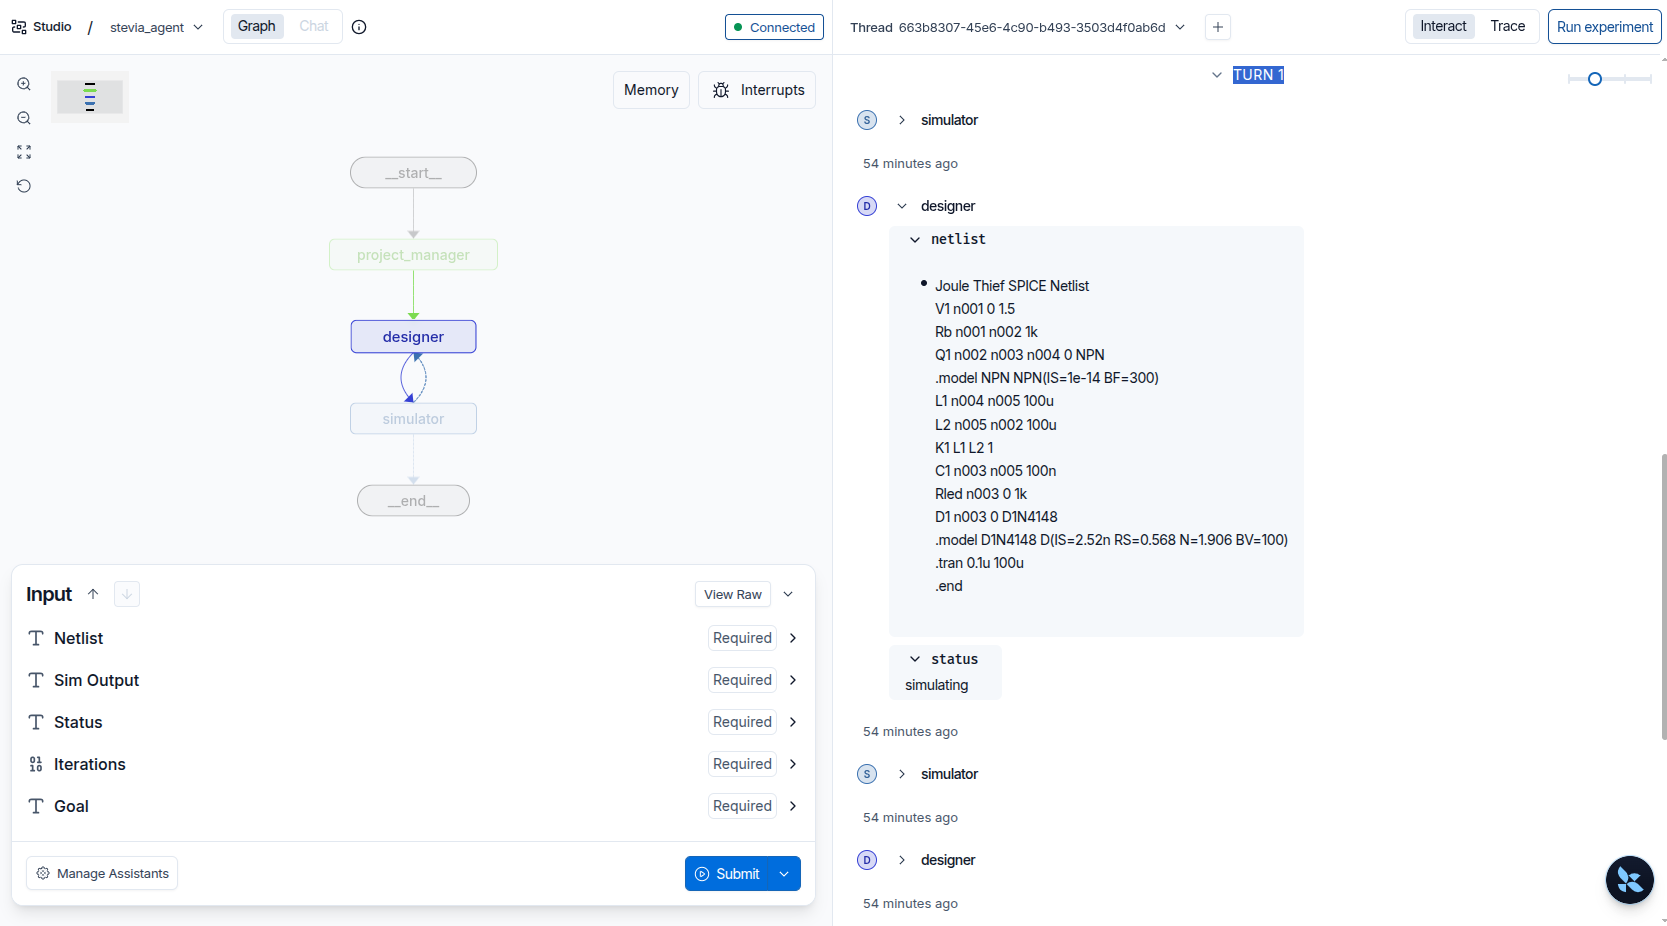
I built Stevia, a LangGraph-powered agent that lives on my local machine, to design Spice circuits. However i need to be able to peek inside, to troubleshoot, and make sure it has everything it needs to do what I need. I will use LangGraph Studio, which is like having a Logic Analyzer for the AI’s thought process.
The Vision: From Chatbots to Orchestrators
Most people use AI as a fancy chat. I’m using it as a General Contractor.
I give the agent a goal—“Build a 1.5V Joule Thief circuit”—and it starts a loop:
Design: Write a SPICE netlist.
Simulate: Run that code through a real ngspice engine.
Analyze: Read the raw simulation logs.
Fix: If it didn’t boost the voltage, try again.
The Tech Stack: A Hybrid Beast
This isn’t just a Python script. It’s a distributed system running across three layers:
The Brain (Local Host): Python 3.12 and the LangGraph CLI.
The Lab (Docker): A containerized ngspice engine and a PostgreSQL database for long-term memory.
The GUI (LangGraph Studio): The web-based “Logic Analyzer” where I watch the nodes light up.
The Tools: Why LangGraph Studio?
Another option is LangFuse. It’ looks like great tool for tracking logs and costs, but it feels like looking at a spreadsheet after the race is over. LangGraph Studio gives you the “In-Circuit” visuals. You can pause the AI, change a variable in the middle of a loop, and hit “Resume.” Just from LangFuse appearance, it feels like reading a flight log and actually sitting in the cockpit. I am an engineer though, and of course i am curious how it works! So that will be in the future.
Preparing the Workbench
Before we can design circuits, we have to prep the environment. Here are the commands that got the “Lab” online:
bash
# 1. Enter the virtual environment
source stevia/bin/activate

# 2. Install the 'Debug Header' (The CLI and In-Memory engine)
pip install -U "langgraph-cli[inmem]"

# 3. Spin up the 'Lab' (Database and Simulation Container)
docker compose up -d

# 4. Verify the Lab Tools are ready
docker exec spice_agent ngspice --version
The First Hurdle: The CORS “Shields”
When you try to connect your local code to the web-based Studio, your browser (my Brave) will try to block it. It thinks the website is “attacking” your local machine.
I solved this by using a Secure Tunnel. It creates a temporary, encrypted bridge so the Studio can talk to my local agent without the browser throwing a tantrum:
bash
# Launch the dev server with a secure bridge
langgraph dev --tunnel
The “First Power-On” Test
In the microcontroller world, the “Smoke Test” is when you power up the board for the first time. In AI engineering, it’s when you hit Submit in the Studio and watch the nodes pulse blue.
I gave Stevia a simple goal: “Build a Joule Thief. If you fail, read the error and fix the netlist.”
Then, I sat back and watched the Logic Analyzer (LangGraph Studio) show me exactly what happens when an AI tries to be an electrical engineer.
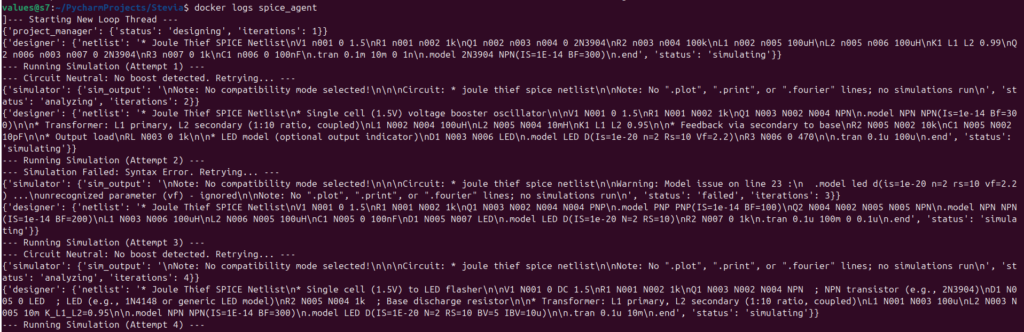
The 10-Iteration “Bailout”
My code has a hardcoded recursion_limit of 10. This is the “Watchdog Timer.” If the AI gets stuck in a logic loop, the system resets before it drains my API budget.
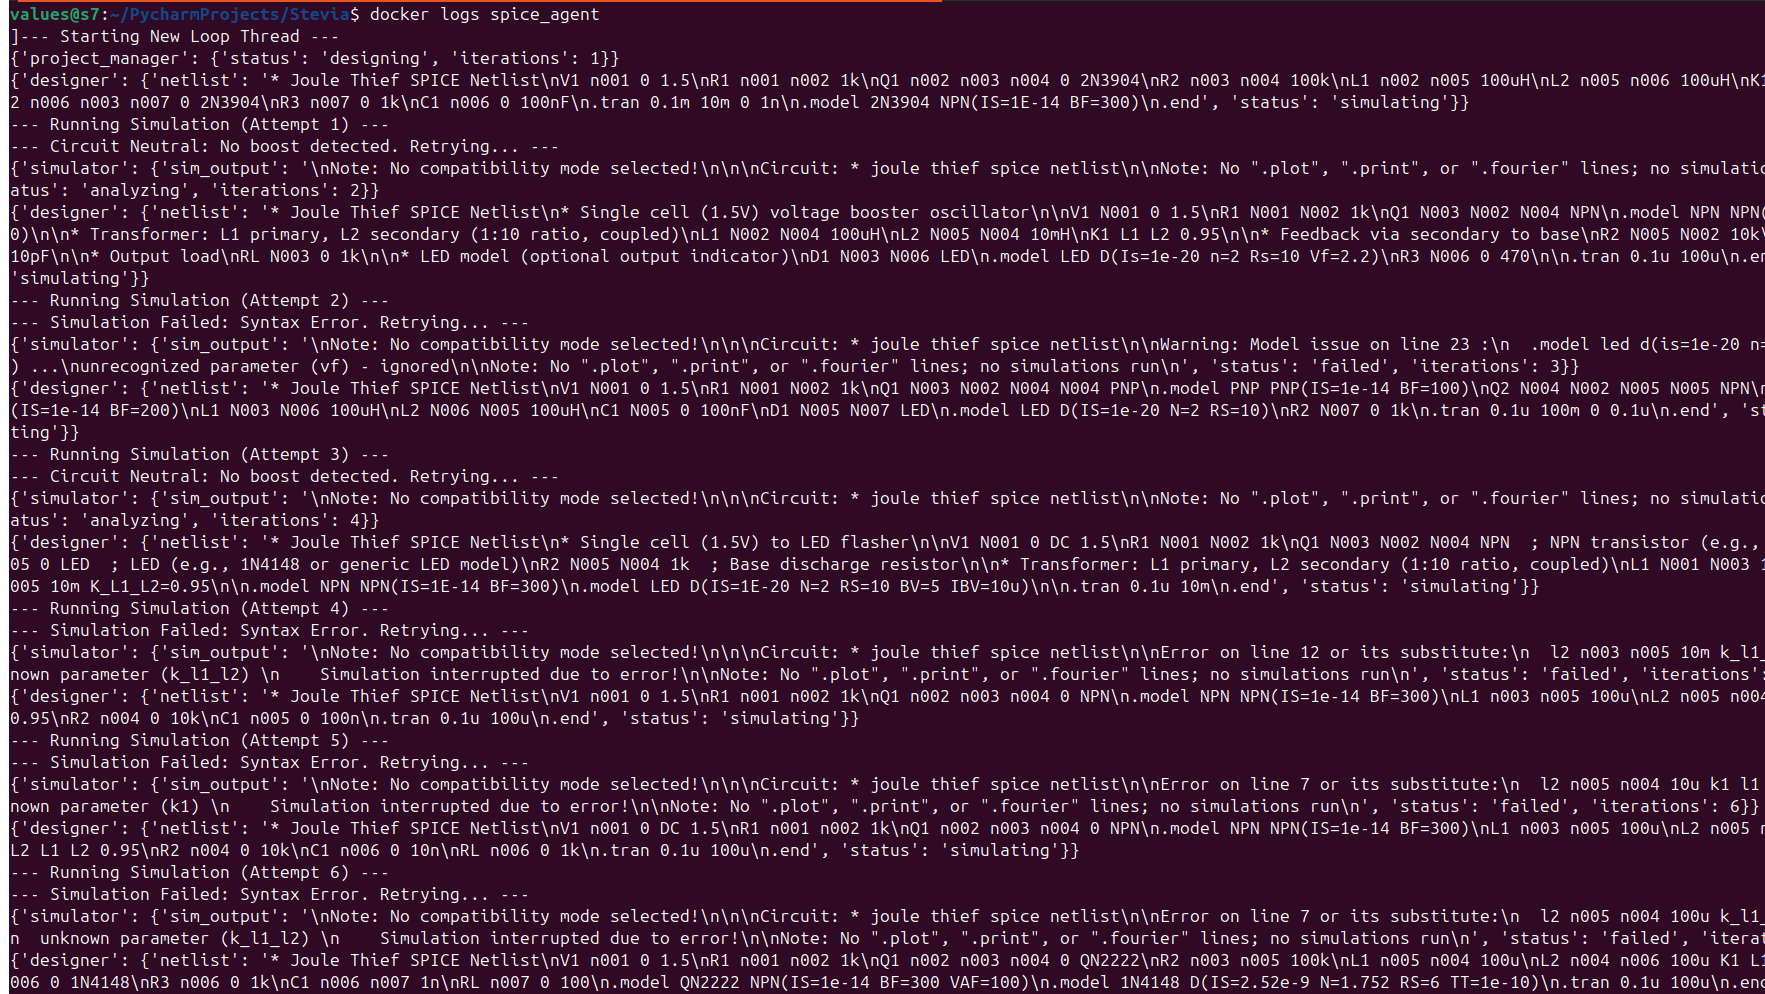
And it did get stuck. 🔄
The Loop of Death:
Designer Node: Generates a SPICE netlist for the Joule Thief.
Simulator Node (ngspice): Runs the code inside the Docker container.
The Crash:Note: No ".plot", ".print", or ".fourier" lines; no simulations run.
Analysis Node: Sees the empty output, flags it as a “Failure,” and sends it back to the Designer.
Stevia did this 10 times. It was like watching a junior dev forget to add a printf statement to their code, then doing it again in ten different ways.
Why the AI Failed (The “Hallucination” Gap)
The AI knows what a Joule Thief is, but it doesn’t always remember the strict syntax of ngspice-44.2.
It’s like trying to compile C code when you’ve only read the textbook but never used the compiler. Without a “Reference Library” or a “Datasheet,” the AI is just guessing component values.
The Successor AI Handoff
Since the 10-iteration limit was hit, I’m treating this as a Memory Handoff. Here is exactly what the system consists of right now and how we’re tweaking it:
The System Blueprint:
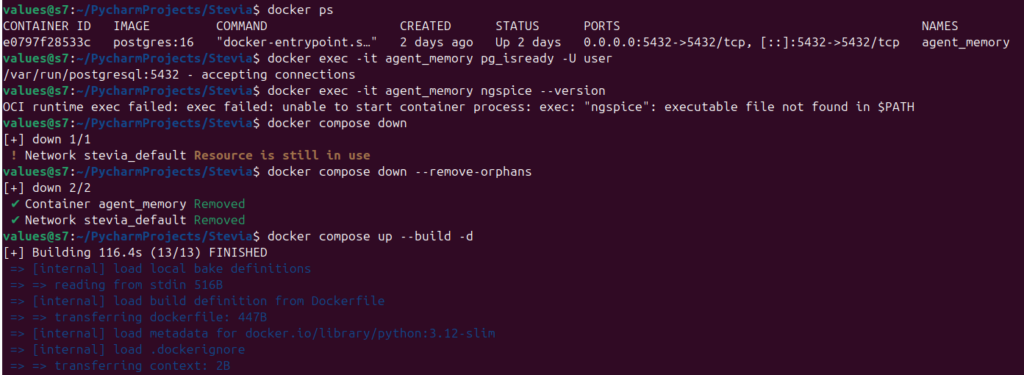
Docker Container (agent_memory): A Postgres 16 instance. It holds the “Checkpoints”—the persistent state of every single run. Even if the container crashes, the memory stays.
Local Environment (stevia): The Python 3.12 venv where the LangGraph CLI manages the API handshake.
The Code (main.py): The “Graph” that separates the Project Manager (Strategy) from the Designer (Coding) and the Simulator (Execution).
Pros & Cons of the Current Build
Feature
Status
Impact
Persistence
✅ Solid
Postgres saves every “Thread ID” (e.g., circuit_test_011).
Tooling
⚠️ Limited
The AI only has a “Netlist Generator.” It can’t “Google” a fix yet.
Observability
✅ Elite
LangGraph Studio lets me step through every failure visually.
The Next Milestone: Giving the Agent Internet of Knowledge
In the next phase, we’re moving beyond “Structured Autonomy” and into Tool-Augmented Engineering.
Instead of letting the AI guess transistor models, I’m giving it a Browser Tool. It will be able to:
Search for real-world transistor datasheets (2N3904, BC547).
Pull the actual Gain (hFE) and Saturation values.
Plug those real numbers into the simulation.
We’re gonna be turning the AI from a “Creative Writer” into a “Data-Driven Engineer.”
Also, I’m looking for partners who want to automate their R&D pipelines. If you have a repetitive engineering task, I can build an agent to solve it while you sleep.
Building an AI Circuit Engineer: The “Stevia” Chronicles ⚡️
So, I decided to replace myself with AI. Or at least, the boring 80% of my job as an electronics engineer.
I’m building an AI agent that doesn’t just “chat” about circuits. It actually designs them, simulates them in SPICE, fails, gets annoyed, and tries again until it works.
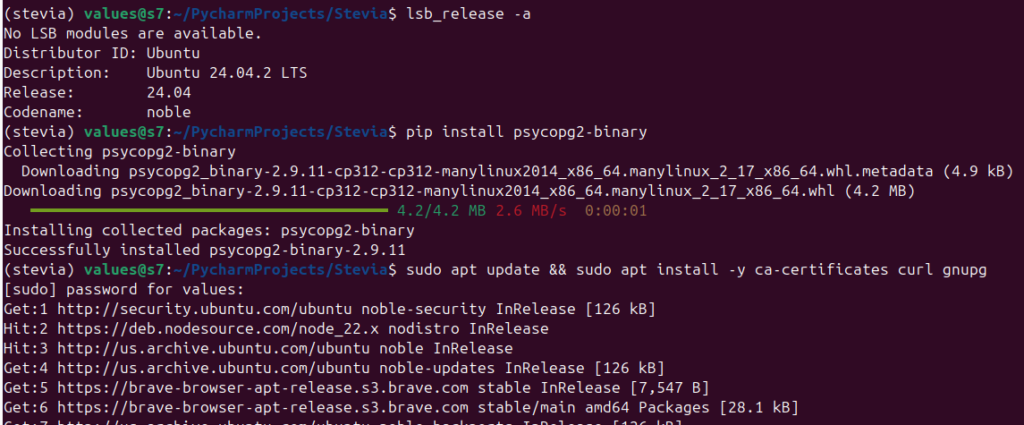
Here is the “Day 0” log of getting the infrastructure live on Ubuntu 24.04. 🛠️
The Mission: Beyond the Chatbox 🧠
Most people use AI to write emails. I want mine to build a Joule Thief circuit that works down to a 0.5V input (like an extremely dead AA battery).
OpenClaw is a bit too chaotic for this. It might hallucinate a transistor that doesn’t exist or spend my life savings browsing Wikipedia.
The solution? LangGraph. It’s like a factory assembly line for AI. More predictable = good! It follows a strict “Design → Simulate → Analyze” loop. 🔄
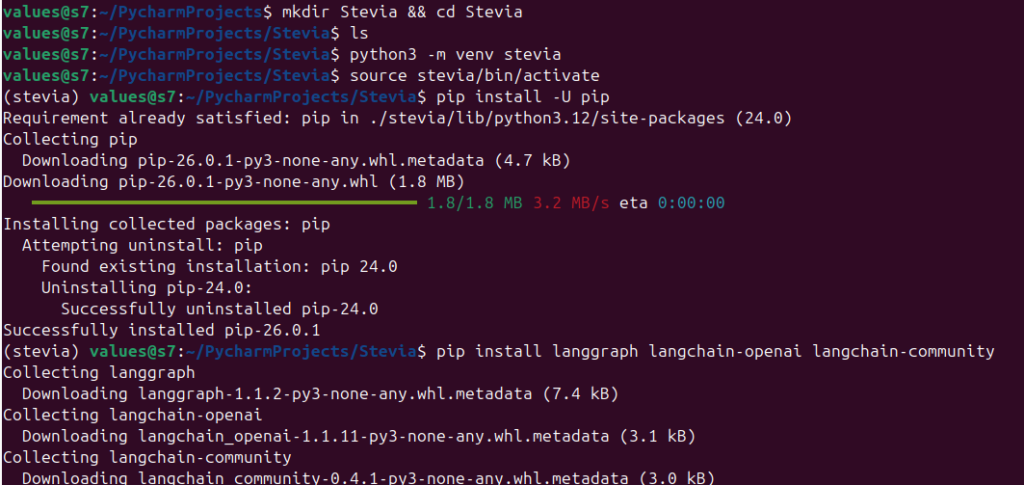
Step 1: The “Brain Surgery” (Python & LangGraph)
First, we needed a clean workspace. No one likes a messy dependency grave.
I set up a dedicated virtual environment and pulled in the heavy hitters:
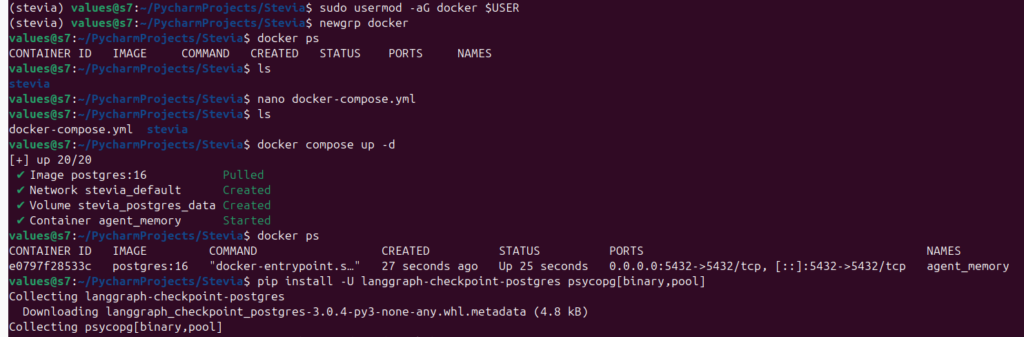
AI usually has the memory of a goldfish. Once the session ends, it forgets your circuit ever existed.
We fixed this by spinning up PostgreSQL in a Docker container. This acts as a “Checkpointer.”
Even if my laptop crashes, the AI can resume from the exact millisecond it left off.
The Docker Compose Magic goes something liek this:
yaml
services:
  postgres:
    image: postgres:16
    container_name: agent_memory
    environment:
      POSTGRES_PASSWORD: password # Don't use this in production!
    ports:
      - "5432:5432"
Step 3: The “Laboratory” (ngspice) 🔬
An AI engineer needs a soldering iron. In the software world, that’s ngspice. It also works with Qucs-s (my favorite new open source simulator!)
I installed it natively on Ubuntu 24.04. Now, the Python agent can “talk” to the terminal and run real-world simulations.
bash
sudo apt install -y ngspice
Current Status: Systems Nominal ✅
We checked the vitals:
OS: Ubuntu 24.04 (Noble Numbat).
RAM: 8GB (Tight, but Docker is behaving).
Memory: Postgres is live and “Listening” on port 5432.
The engine is idling. The database is waiting. 🏎️
Lessons from the Trenches 💡
Ubuntu is King (Ditch Windows): Running Docker natively (no VM) saves massive amounts of RAM.
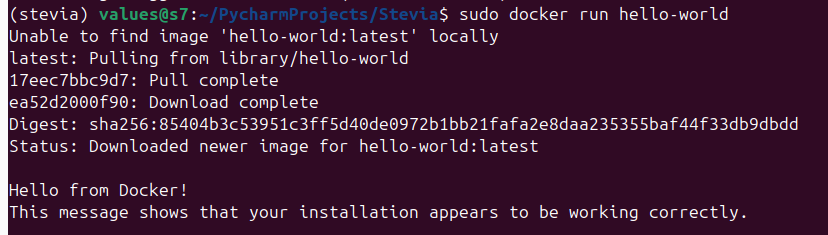
Docker Permissions: Don’t forget to add your user to the docker group, or you’ll be typing sudo until your fingers bleed.
Brevity is Key: Keep the Docker images light. We don’t need a whole OS inside a container just to run a simulation.
The AI Engineer Gets a Lab Coat: Memory & Simulations 🥼🔋
We’ve moved past the “talking” phase. My AI agent now has a persistent memory and a functional workbench.
If this were a movie, this is the montage where the robot finally stops crashing into walls and starts soldering components (or through them)…
Step 4: The Handshake (Persistence is Key) 🤝
I didn’t want a “Goldfish AI” that forgets everything the moment I close the terminal.
We used LangGraph Checkpoints to wire the agent directly into our PostgreSQL database. Now, every design iteration is saved as a “Thread.”
The Win: I can crash the script, reboot my laptop, and tell the AI: “Resume thread circuit_test_003,” and it picks up exactly where it left off.
python
# The magic "Save Game" button
with get_checkpointer() as checkpointer:
    app = workflow.compile(checkpointer=checkpointer)
    # Resume or Start Fresh? The DB knows.
Step 5: Hiring the Staff (The Hierarchical Team) 👥
Instead of one AI trying to do everything, I hire 3 brains for specialized roles:
The Project Manager (PM): The high-level strategist. It handles the budget and says, “We need a Joule Thief.”
The Designer (The Engineer): This is the specialist. It doesn’t chat; it writes SPICE netlists.
The Lab Tech (The Simulator): A “blind” node that takes the code, runs it through ngspice on my Ubuntu kernel, and reports the raw data back.
We ran our first end-to-end test. Grok-4-1-fast “successfully” generated a SPICE netlist for a 0.5V Joule Thief.
It even included the magnetic coupling (K1 L1 L2) and the .tran analysis command.
Pro-Tip: AI loves to wrap code in Markdown backticks (“`). My agent was “clogging” the simulator with those, so we added a Code Cleaner to strip the fluff before it hits the engine.
Lessons from the Trenches 💡
Context Managers are Picky: If you close your Database Pool too early, your AI “goes blind” mid-thought. Keep that with block open!
Ubuntu + Docker = Speed: The “Handshake” with Postgres is nearly instant because they’re sharing the same Linux kernel. No VM lag here.
Current Status: Simulation Live! ✅
Memory: Persistent (Postgres is hungry for data).
Brain: Connected (Grok is writing code).
Hardware: Simulation engine (ngspice) is now triggered directly by the AI.
Next, we’re going to teach the AI how to read its own failures. Because let’s be honest—the first circuit almost never works. 🛠️🚀
The “Angry Engineer” Loop (When AI Learns to Fix Itself) 🔄🛠️
The “It Compiles, But Does It Work?” Problem
So we got the AI to write a SPICE netlist. It was beautiful. It was clean. And… it didn’t work. The simulation ran, but the “LED” stayed dark. In the real world, an engineer would grumble, look at the scope, and swap a resistor.
I decided my AI shouldn’t be any different.
Step 7: The “Closed-Loop” Feedback (The Brain Upgrade) 🧠
I updated the Designer Node to be more than just a code generator. Now, it has “Eyes.”
If the Simulator detects a failure—or worse, a “flatline” where the circuit doesn’t oscillate—it feeds the raw error log back into the AI’s prompt.
The result? The AI sees: Node Out: 8.34e-23V. It realizes: “Oh, the oscillator didn’t start.” It then tweaks the inductor coupling or the transistor bias and tries again.
Iterations iterating:
Step 8: The Safety Switch (Budget Protection) 💸
Giving an AI an infinite loop is a great way to wake up to a $500 API bill. We built a Router Node that acts as the “Adult in the Room.”
The Success Check: Did actually exceed (more on this later)?
The Iteration Counter: If it hasn’t solved it in 10 tries, it kills the process (and escalates it to me).
Step 9: Full Portability (The “Cloud-Ready” Docker Move) ☁️
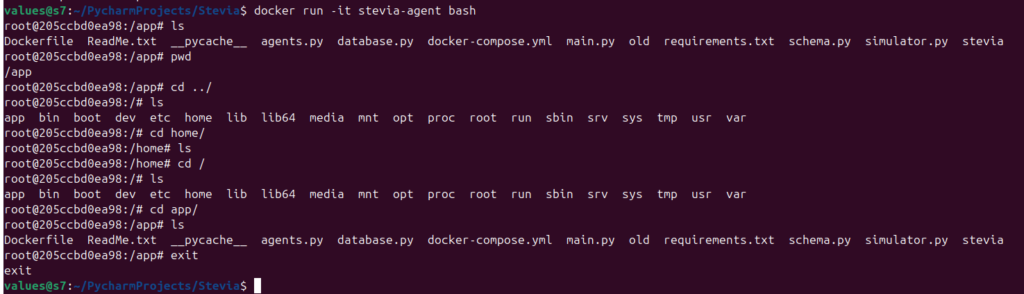
To finish the infrastructure, we moved the Agent itself into Docker. Instead of a “Hybrid” setup (Database in Docker, Python on the host), the whole “Lab” is now a single, portable unit.
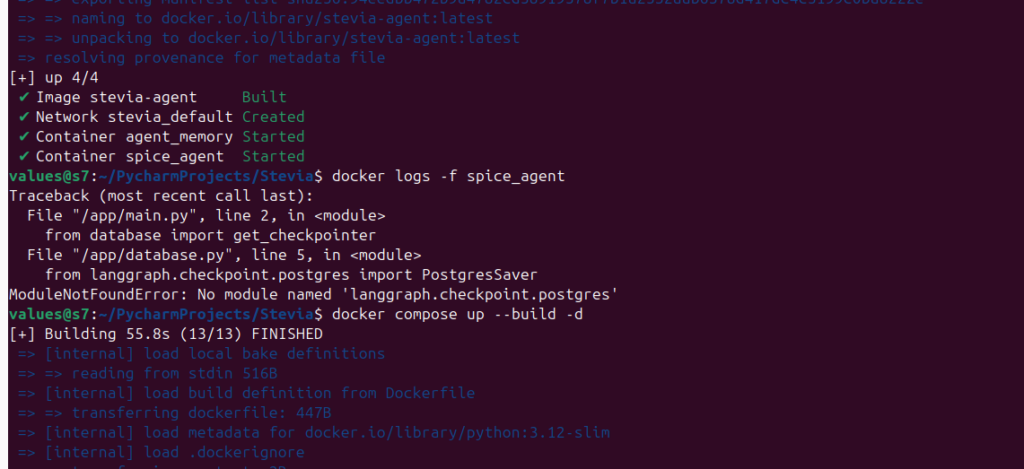
The “Master” Command: docker compose up --build
Now, the Python Agent, the ngspice engine, and the Postgres Memory all live in a synchronized dance. I can move this entire folder to a $10/month VPS, and it will start designing circuits exactly where it left off.
Lessons Learned: 💡
Logic is cheaper than LLMs: Using a simple Python function to check for “Error” in the text before calling the LLM saves massive amounts of tokens (more on this soon).
Networking in Docker: Containers don’t know what localhost is. You have to tell the Agent to talk to db:5432. Once they “shake hands,” the speed is incredible.
The “Lazy” AI: Sometimes the AI gets stuck in a loop and starts outputting the same broken code. Providing the previous failure in the prompt is the only way to “force” it to innovate.
Final Status: Fully Autonomous Circuit Agent ✅
Brain: Grok-4-1-fast (Iterative & Analytical).
Memory: Postgres (Persistent Threads).
Workbench: ngspice (Containerized & Automated).
Loop: Closed (The AI now learns from its own mistakes).
The infrastructure is solid. The “Stevia” agent is officially in the lab. Next stop? Optimization for real-world efficiency. ⚡️🚀
The Cliffhanger: Navigating the Ghost in the Machine 👻
Everything is running, but here’s the problem: when you have an AI agent looping inside a headless Docker container, it’s like watching a black box. I can see the logs, but I can’t easily see the why.
How do I know exactly where the Project Manager’s strategy went off the rails? How do I pause the AI mid-thought to fix a netlist before it wastes another simulation?
Next up: We’re going to pull back the curtain. I’ll show you how to hook up LangSmith and LangGraph Studio to turn these invisible terminal logs into a full, interactive “Mission Control” dashboard. We’re going to visualize the agent’s brain in real-time.
Full Exact Steps to Replicate:
Step 1: System Prep & ngspice Installation
First, we update the system and install ngspice, the “engine” our AI will use to simulate circuits.
We need Docker to run our database and the agent environment. These commands install Docker and allow you to run it without typing sudo every time.
bash
# Install Docker
curl -fsSL https://get.docker.com -o get-docker.sh
sudo sh get-docker.sh

# Add your user to the docker group (Log out and back in after this!)
sudo usermod -aG docker $USER
Step 3: Project Structure & Virtual Environment
Create the project folder and a Python virtual environment to keep our dependencies clean.
bash
# Create project directory
mkdir ~/Stevia && cd ~/Stevia

# Setup virtual environment
python3 -m venv .venv
source .venv/bin/activate

# Install the "Big Three" libraries for LangGraph and Postgres
pip install -U langgraph langchain-openai "psycopg[binary,pool]" langgraph-checkpoint-postgres
Step 4: The Requirements File
This file tells Docker exactly which Python libraries to install inside the “mini-computer.”
Finally, set your API key and tell Docker to build and run the entire system.
bash
# Set your API Key (Replace with your actual key)
export XAI_API_KEY="your-xai-api-key-here"

# Build the images and start the containers in the background
docker compose up --build -d

# Live-stream the AI's "thought process" and simulations
docker logs -f spice_agent
Step 8: Managing the Lab
Use these commands to stop the agent or check the status of the “mini-computer.”
bash
# Stop the agent and the database
docker compose down

# Check if the database is still running
docker ps
In 2003, I was obsessed with building beautiful websites. I would tweak every pixel, chase perfection, and tell myself I was just one feature away from showing it to the world. I kept building quietly, thinking that if I could just make it flawless, then people would come.
But years later, I realized something painful: I never actually offered my services. No clients. No feedback. No growth. Just a hobby that never went anywhere.
So life took me in another direction for many, many years.
Looking back, the problem wasn’t that I lacked skill or passion. It was that I was waiting for perfect. And perfect never comes.
If you’re sitting on an idea for a business or service right now, here’s the truth: your biggest risk isn’t launching too early. It’s never launching at all.
Every day you spend “getting ready” is a day your idea doesn’t exist in the market. No one can react to it. No one can pay for it. No one can tell you what’s working or what’s missing.
When you hold back until everything feels polished, you delay the very feedback that would make your offer great. Confidence doesn’t appear first. It grows from doing the thing and seeing how people respond.
So instead of asking, “Is it ready?”, start asking, “What’s the fastest way I can test this?”
Make It Exist, Make It Better Later
That’s the real secret to momentum. The best business builders aren’t the ones who nail it on the first try. They are the ones who iterate faster. They put something small but clear into the world, watch how people react, and make it better.
It’s like finding your Ikigai, that sweet overlap between what you love doing and what truly helps others. You won’t find it in theory. You find it through service, by showing up, offering value, and adjusting based on real people’s needs.
When you build for others, not just for yourself, you start to feel an energy that keeps you going even when it’s slow or uncertain.
If You Don’t Believe in It, No One Else Will
Let’s be honest. Things are saturated. There are thousands of people offering every imaginable service online. Unless you truly believe in what you do and love it enough to talk about it on camera, chances are it’s not going to go anywhere.
But if you love it, almost nothing will stop you. You’ll talk about it naturally, share it joyfully, and stay consistent even when results are slow. That kind of energy is contagious. People can feel it. And that’s what cuts through the noise.
Build something that matters to you. Something you’d be proud to stand behind publicly. That’s the foundation that sustains everything else.
Your First Offer Should Be Simple but Irresistible
Don’t try to build the perfect product. Build the simplest offer that solves a real problem right now. You don’t need ten features. You need one clear transformation.
Ask yourself: What result can I deliver in the next week for someone? How can I make it easy for them to say yes? People don’t buy complexity. They buy clarity. When they instantly understand what you do and how it helps, you win.
Launch Fast, Learn Faster
The first version of your offer isn’t about profit. It’s about proof. You’re testing three things: the problem, the promise, and the price. If even a few people respond, you’re onto something. If they don’t, great. You just bought clarity faster than most people ever will.
That’s why the smartest founders treat every launch like an experiment, not a final exam.
How to Get Started Fast Without Overwhelm
If you’ve been holding back because you “don’t have the tech figured out,” this part is for you. At VerseOne.ai, we help small businesses go from idea to live website in just a few days, not weeks.
We’ll set you up with a complete WordPress site that’s fully integrated with Stripe for payments, WooCommerce for products or services, Printify for branded items, Mailchimp for email follow-up, and all the AI automations you’ll need to handle scheduling, chat, and lead capture. That means you can start testing your idea this week, collect real feedback, and improve as you go. You can perfect the design later, once you’re earning and learning. You don’t need a designer website for this!
AI Helps You Build Momentum, Not Distraction
AI shouldn’t replace your creativity. It should amplify it. It helps you write clear messages faster, automate repetitive tasks, capture leads while you sleep, and stay consistent when life gets busy. The faster you can test, learn, and adjust, the quicker your business grows roots. That’s the real advantage small business owners have: agility.
Don’t Wait for Perfect. Start Now
Every idea has a window of energy, and yours is open right now. Don’t let it fade under “someday.” You don’t need perfect. You need motion. Launch something small. See what happens. Improve it next week. That’s how every great brand, and every lasting business, actually begins.
Bonus: The 70/30 Rule for Action
Perfectionism can be a sneaky obstacle for founders & entrepreneurs. One practical method to keep things in check is the 70/30 rule. It’s simple but powerful: aim for 70% completion, then move forward. The final 30% of effort often brings diminishing returns and can trap you in endless tweaks. If you really need to update, do it later!
Here’s how to apply the 70/30 rule to your business and projects:
Aim for “good enough”: Focus on getting a task about 70% of the way to completion. This is often sufficient to start testing or showing it to real people.
Accept the outcome: When you hit the 70% mark, give yourself permission to move on. The extra time spent on the last 30% usually won’t yield proportional benefits.
Interrupt self-criticism: When you catch yourself criticizing a task for not being perfect, ask, “Is this better than 70%?” If yes, acknowledge the progress and move forward.
Celebrate progress: Each time you apply the rule, you reinforce a habit of action instead of waiting for perfection.
Set realistic goals: The 70/30 rule shifts your focus from unattainable perfection to achievable outcomes, making it easier to take the first step.
Think of it this way: the first 70% of effort often delivers more value than most people’s 100%. By learning to launch, test, and iterate without getting stuck on the last 30%, you free up time, energy, and creativity for growth and improvement.
Book a Free Consultation
Ready to stop overthinking and start testing your idea? Let’s make it real. Book a free consultation with VerseOne.ai and let’s use AI to help you build, launch, and refine your idea faster than ever.